DIY Christmas Button Wreath

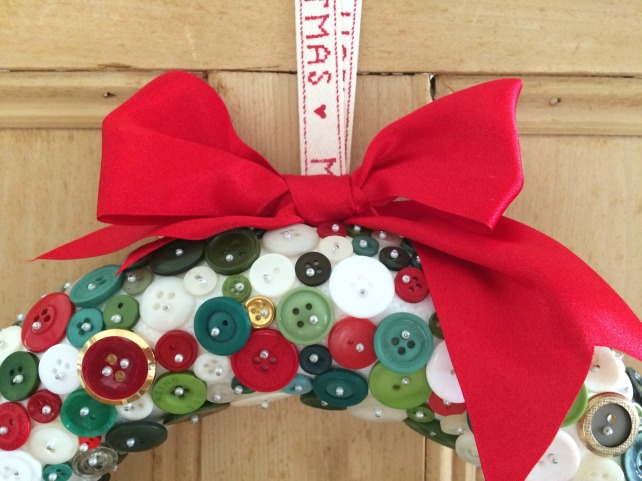
handmade-button-wreathHello! I’ve got another festive make for you today and I think it’s one of my favourites so far: a do-it-yourself Christmas button wreath! I think it’s perfect for a sewing or crafting fanatic’s home, don’t you?

The inspiration for this make came from the lovely Lisa at A Spoonful of Sugar. I saw her own button wreath on Twitter and knew straight away that it was something I’d like to copy. Who else has a collection of 10 million buttons at home that they need to use up? My sister thinks I need to join Button Hoarders Anonymous, but I’m sure it can’t just be me…

If you’d like to make a button wreath of your own then you’ll need:
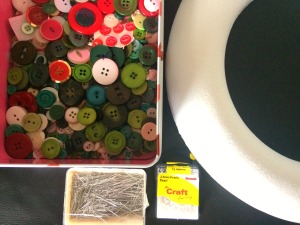
button-wreath-what-you-need– Buttons! My sister and I spent a good half hour sorting through my collection to pick out all the red, white, green and gold ones, but you can pick whichever colours you want. I think we easily used about 400 buttons.
– A 30cm polystyrene wreath.
Dressmaker pins.
2.5mm beads. I used pearl coloured ones.
– Co-ordinating ribbon. I used some by Gisela Graham that I had in my stash.
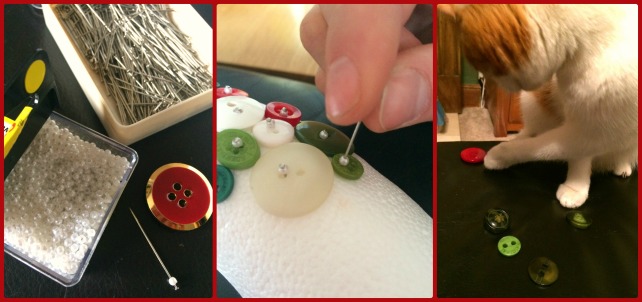
diy-button-christmas-wreathDecorating the wreath is very easy! My sister and I spent about 3 hours yesterday afternoon pinning in all the buttons. You simply thread a bead onto your pin, and then push the pin through the hole in the button and straight into the polystyrene. It’s important that you don’t forego the beads as these prevent the buttons from falling off! We chose to go for a random colour pattern too, although you could do stripes, varigated colour or all one colour if you wanted.
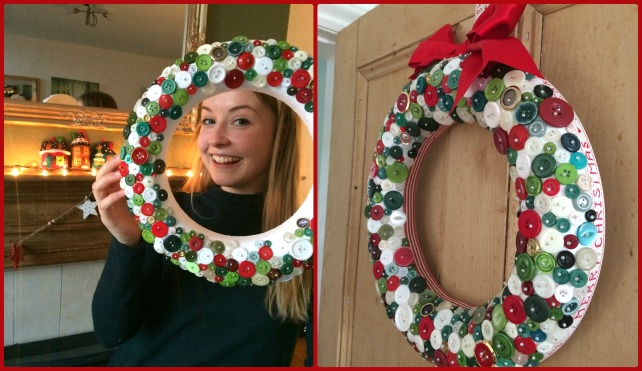
how-to-make-a-button-wreathI also chose to pin a ‘Merry Christmas’ ribbon around the outside edge, and a red and white striped ribbon to the inside edge, partly because I like the look of it and partly because we were running out of buttons to cover the entire wreath! I’ve estimated that we used around 400 buttons for this, so you’d easily need 500+ to cover every available space. I had a mixture of button sizes too, ranging from tiny shirt buttons to bigger 2cm diameter ones, and in a variety of different shapes and shades.

diy-button-wreath-ribbon

Finally, I made a loop out of ribbon to hang my wreath with (this is just pinned in place on the back), and then used a piece of wide red ribbon to create an over-sized Christmas bow, which I also pinned in place on the top. And there we have it! An afternoon well spent. What do you think?

make-a-button-wreath

Save

Save

Save

Save

Blogger Network #28 – Felt Christmas Decorations

dimensions-holiday-home-felt-ornaments

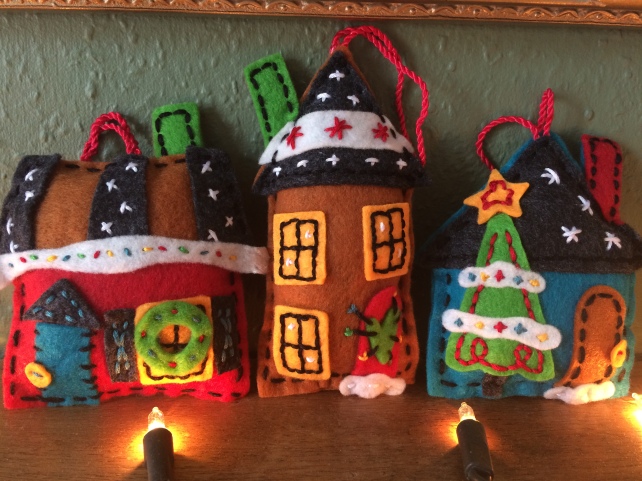
Hello November! A new month brings with it a new Minerva Blogger Network project, and this month I’m keeping things festive with these cute felt Christmas house ornaments. These were an absolute delight to make and I think they’ll look lovely alongside the Father Christmas cushion I made last month – don’t you?

Click here to read more about my festive make!

Blogger Network #9 – Felt Woodland Animal Christmas Decorations

Here we are in November, meaning that Christmas is just around the corner, eek! For this month’s Minerva Blogger Network post I chose to do something a little festive and a little fun – felt woodland animals! In fact, a whole garland (woodland?) of felt animals.

simplicity 1516 felt animal christmas bunting

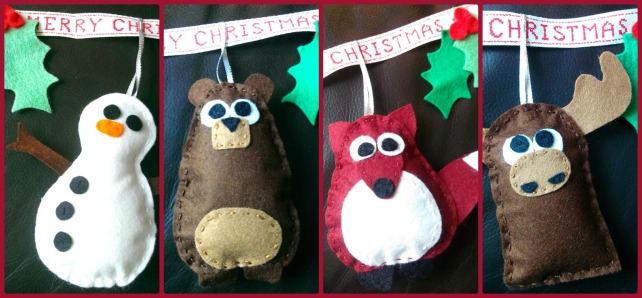
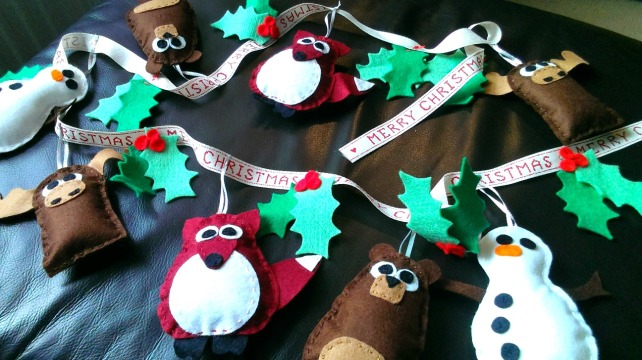
The pattern/templates that I used came from Simplicity 1516 – an entire sewing pattern dedicated to felt animals and Christmas stockings. Marvellous! I chose to make the moose, fox, bear and snowman patterns as they’re my favourites out of the bunch, but you can also make a squirrel and a green owl if you want to! All you need to make the decorations is felt – which Minerva Crafts has in good supply and in a gazillion colours (literally) – plus a needle and thread and some toy stuffing. I also got a long piece of spangly ribbon to make the loops and some Merry Christmas ribbon so that I could make my creatures into a garland.

simplicity 1516 felt woodland animal bunting

To make the felt animals, you simply cut out all the pieces that you need, sew on the faces/arms/antlers etc, sew the back and front bits together with a ribbon loop in between and then stuff some toy stuffing inside. Easy! Some of the pieces are a little bit fiddly (like the eyes and that carrot nose) so I used a little bit of Pritt Stick to hold them in place whilst I stitched them on. I made 2 of each creature in total and then cut out some holly leaves and berries to make my woodland garland that bit more festive.

I hope you love this project as much as I do – it’s so much fun to make and I certainly recommend it!

DIY Scandi-Style Christmas Wreath

DIY scandi christmas wreathI’m not sure that I’ve ever had a Christmas wreath. It’s a tradition that a lot of families honour – displaying wreaths made of holly, ivy, tinsel and fairy lights on their front doors in the run up to the big day – but a tradition that my own family have just never bothered with. Now that I’ve got my own house however, (and a Hobbycraft store just around the corner) I thought it was about time that I made my very first DIY Christmas wreath! What do you think?

To make your own Scandi-style Christmas wreath like mine you will need: 1x 12″ ratten wreath, 1x 6cm wired robin, 1x reel of striped ribbon, a sheet of red and white polka dot felt, a few pearl beads, some wired ivy leaves and a set of battery powered fairy lights (mine were £1.50 from Primark!).

I love the Nordic Christmas colour scheme – red and white – so it was easy for me to pick a theme for my wreath. I’ve seen so many designs and tutorials out there for wreaths of various kinds but decided to use my imagination instead of following a pattern. Have you made a wreath this year (or in years gone by)? I’d love to see some pictures if you have!

make a scandi style christmas wreath

3 Year Blog Anniversary – My Top 5 Posts!

anniversary-1xA couple of days ago I got an unexpected notification from WordPress telling me that this week I should be celebrating my 3 year blog anniversary (blogaversary?). This is quite a significant milestone – this means that I’ve now been teaching myself to sew for THREE years. So, in celebration, I’ve decided to take a look back into the past. Here are my Top 5 Blog Posts for you to enjoy again!

felt robins1. Make Your Own Felt Robin Christmas Decoration
This post is the most popular on my blog by a long, long way. It seems you love making your own Christmas decorations! It’s actually one of my least favourite things that I’ve made but that appears not to have deterred my readers…

origami bow2. Origami Bow Tutorial
So popular I posted this blog entry twice! These little origami bows are so cute – if you’ve not given it a go yet I suggest you try now – all you need is a square of paper and a pair of scissors. I spotted the instructions originally on the fab papercraft site Paper Kawaii and never looked back.

felt decorations3. Felt Christmas Decorations
Once again it’s a Christmas post! This time around I found myself making a felt Christmas pudding and a felt Christmas tree. Both were super fun to make and took hardly any time at all. I definitely recommend making a few to customise your own tree this year.

cupcake cross stitch4. Cupcake Cross Stitch
This colourful cross stitch design is by a lovely lady named Lucie Heaton. I got the design from CrossStitcher magazine and used it to decorate one of the crafty canvases that I made. It took me a fair while to get it finished but the end result is so eyecatching! Check out Lucie’s website here when you get chance – she has some really cute designs available to download and print. I particularly love the little baby mouse, designed in celebration of the royal baby!

Needle Case5. Needles and Pins
And the final post in my Top 5 is this handmade needlecase. The pattern is from Cath Kidston’s Sew! book and it was one of the first items I ever made! If you don’t already own this book, and love making handmade homewares, then I suggest you get yourself a copy. I’ve sewn almost every item out of it! You can also check out all my Cath Kidston blog posts here.

Dolly Peg Angels

dolly peg angelI’ve opened three doors on the Advent calendar, we’ve put up our first Christmas tree and I’ve watched Disney’s A Christmas Carol: it’s clear that Christmas has definitely arrived chez-nous. We even went on a shopping trip with work this morning to buy lots of tacky decorations for the office. I now have a festive lava lamp and some fake, felt snow on my desk.

Anyway, amongst others, dolly peg angels are one of the handmade Christmas decorations I’ve decided to make this year. These are something I used to make when I was little and, I’m happy to say, are just as fun to make 15-20 years on.

All you need to do is adorn a wooden, dolly peg with paper doilies and white lace. I made a pleated fan from half a doily to create the wings and stuck on some yellow wool for hair. I even managed to find a peg that already had a smiley face drawn on from last time I (or my sisters) decided to create peg angels!

Toilet roll angelThe angel I made now hangs proudly near the top of our Christmas tree and I plan to make a few more when I get chance. Give it a go – it’s a great first time craft!

I’d also like to give a quick shout-out to my sister’s toilet roll angel – inspired by my very own toilet roll nativity scene

Preview… #loorollnativity

After the success of my toilet roll choir, my sister said to me ‘Louise! Those loo-rolls are amaazing!!! Hahah! You could do a whole nativity scene!!’.

A whole nativity scene made out of cardboard toilet-roll tubes? What idiot would I be not to accept this kind of challenge…

And so the #loorollnativity2012 begins. I commence with the toilet roll shepherd – who says you can’t get something for nothing?

Check out the finished nativity scene here!

Toilet Roll Choirs

This morning I uttered a phrase that I don’t think has ever been uttered in the history of utterances: ‘Oh no’ I said, ‘I’ve put all the empty loo-rolls in the recycling box. I’ll have to go fish around and get them back out so I can make my loo-roll choir’. It’s fair to say that my other half had no response.

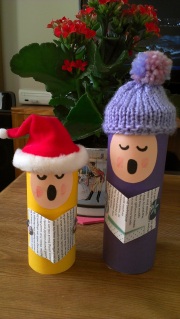
The story goes like this: I was looking online for ideas of handmade Christmas crafts and I came across the photograph above. It’s from a fellow craft-blogger’s website which can be found here. I’m also in the process of writing a kids’ Christmas article for ReallyKidFriendly, so thought it would fit in nicely.

This craft is also perfect (almost too perfect in fact) for those innocent smoothie woolly hats that have been circulating the UK for the past few years. Don’t know what I mean? Check the innocent website here. Around Christmas time, each of their smoothie bottles comes with its own, miniature woolly hat in a grand attempt to raise money for Age UK. And they just happen to be toilet-roll size.

I used half a kitchen-roll tube and a toilet-roll tube for my choir of two singers that you can see in the picture. I wrapped each tube in coloured card, securing it with double-sided tape, and put a circle for the face near the top. I drew on the face in permanent marker and used a bit of red, Crayola pencil to highlight the rosey cheeks.

I cut out mitten shapes from some patterned card and a song sheet for each choir member from an old magazine. Crease the magazine down the middle and then carefully attach it, with the mittens, to the tube. Pop on a woolly hat and there you have it!

Bet you didn’t think a toilet roll choir was going to be on your wish list this year, did you?

And a quick update – check out my toilet roll nativity scene – what more could you need this Christmas?

Make a Felt Gingerbread Man

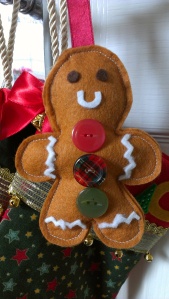
Run, run as fast as you can… next up on my list of Christmas crafts is this adorable, felt gingerbread man decoration. With felt, ric-rac icing and big, Christmassy buttons, what’s not to love?

This guy’s made from two pieces of brown felt sewn together by machine and stuffed with a bit of wadding. I’ve used a red ribbon to hang him from the tree and chose three of my biggest, brightest buttons to adorn his tummy.

Want to copy him yourself? This gingerbread chap took me about half an hour. I drew the pattern freehand and took it from there. Give it a go!

How To Make Your Own Christmas Stocking

This weekend I’ve been fairly busy preparing both house and soul for this year’s Christmas; my first Christmas in our new house. Handmade is the theme – I plan to stitch as much as I can so that when the big day arrives I can marvel at my greatness and have a range of items that I can use for years to come. I’ve also created a new Christmas category – click here to see it! It’s full of all my posts that feature Christmas crafts, including Christmas cards and decorations.

Whilst you’re busy clicking, if you could all just click here and vote for my blog too, that’d be great. You don’t need to fill anything out, just click!

Anyway – this weekend I was paid a visit from my uttermost favourite, crafty friend. She brought with her a plan to make Christmas stockings, sheets of colourful material and bags of sparkly felts and threads. We are one and the same.

Everything was laid out on my dining room table (and all over the floor) and we set to work creating our homemade Christmas stockings. First we drew the pattern on baking paper, traced it onto the outer fabric and lining fabric and cut it all out. I’ve used a mixture of green and red patterned and plain Christmas fabrics (all fat quarters). If you’re doing this yourself, you’ll need 4 stocking shapes altogether – 2 for the lining and 2 for the outside (2 fat quarters in all). I decided to do different patterns on the back and front and then plain inside and for the cuff.

Next we machine-stitched the pieces together as following the pattern (a very easy tutorial that my friend found online) and turned them right side out. At this stage, the lining is pushed down into the inside so that you can fold over the top of the stocking and create a contrasting colour cuff.

And then it was time to embellish. I chose to stitch a gold ribbon around the edge of the cuff, with a line of gold braid to cover the stitching at the top. I then sewed 10 little gold bells all the way around the ribbon so that the stockings sound just like Christmas with even the slightest movement (a foolproof plan to catch Santa in the act this year no doubt). I added a piece of gold rope to the side so that we can hang them up and again covered my stitching tracks, this time with a red bow. I even cut out our initials in felt and attached them alongside a Christmas-themed button just to make sure Santa knows he’s got the right house.

If you’re looking for something super-personalised this year, I suggest giving this idea a go. The pattern is very easy to follow, they don’t use a lot of material and then end result looks great!